


You want to run n8n on Kubernetes. But you don’t want it to break every time something goes wrong.
Most of the setups have the same problem: a pod restarts, and your workflows disappear. You try to copy the setup to another server, and it does not work.
Helm solves this. It is basically an app installer for Kubernetes, so instead of writing a lot of configuration files by hand, Helm handles everything for you. You just run one command to install and one to update if anything breaks.
This guide shows you how you can deploy self-hosted n8n on Kubernetes with Helm securely and keep your data safe when pod restarts. Each step is explained clearly, so there are no assumptions and no skipped steps.
Are you ready? Let’s start.
TL;DR
Quick Steps to Deploy n8n on Kubernetes with Helm
What is Kubernetes with Helm?
Kubernetes is a tool that runs your apps in containers and keeps them alive. If your app crashes, Kubernetes restarts it automatically, and if you need more power, it can easily scale up. It’s just like a manager that watches over your machine 24/7.
Helm is a package manager for Kubernetes, like the App Store, but for its server apps. You don’t need to write lots of complicated config files to deploy something because Helm gives you a ready-made package called a chart. You run one command, and everything is set.
Together, they work like this:
If you don’t have Helm, then deploying something on Kubernetes means writing dozens of configured files by hand. But with Helm, it’s just one command.
Why use Helm to deploy n8n?
Deploying n8n on Kubernetes without Helm means writing and managing dozens of config files by hand. One mistake and your workflow breaks. Helm packages everything into one clean setup.
Here’s why that matters specifically for n8n production deployment:
That is why Helm is the right way to deploy n8n on Kubernetes. You have less manual work, and fewer things can go wrong.
Why Should You Run n8n on Kubernetes?
If you are running n8n for real work, it needs to stay up. One crashed process and one bad deployment, and your automations stop running.
You can miss triggers, and you will be spending more time fixing instead of building Kubernetes, which takes that problem away.
Bottom Line: Kubernetes gives n8n the foundation it needs to run reliably at any size. It stays up and scales when needed and recovers on its own. This is the kind of setup you can actually depend on.
Why do you need a VPS for this?
Before you can run n8n on Kubernetes, you need somewhere to host it. Your laptop won’t work because it’s not always on and is not publicly accessible at all times.
This is where a VPS comes in for obvious and good reasons, like:
A VPS is the simplest and most affordable way to give your n8n Kubernetes workflow cluster a permanent home. It keeps your n8n reachable and running with security.
Step-by-Step Deployment of n8n
Now let us see simplified and easy steps that you can use to deploy your n8n on Kubernetes; just pay focus on every single step so your workflow doesn’t break in the end.
Recommended providers
If you need any recommendations for hosting providers ,Based on my research and popularity along with overall features comparison I can recommend QloudRDP, DigitalOcean, and Hetzner as top 3 providers among others out there.
Note: If you are running heavy workflows or planning to scale later, go with 4 CPU cores and 8 GB RAM from the start.
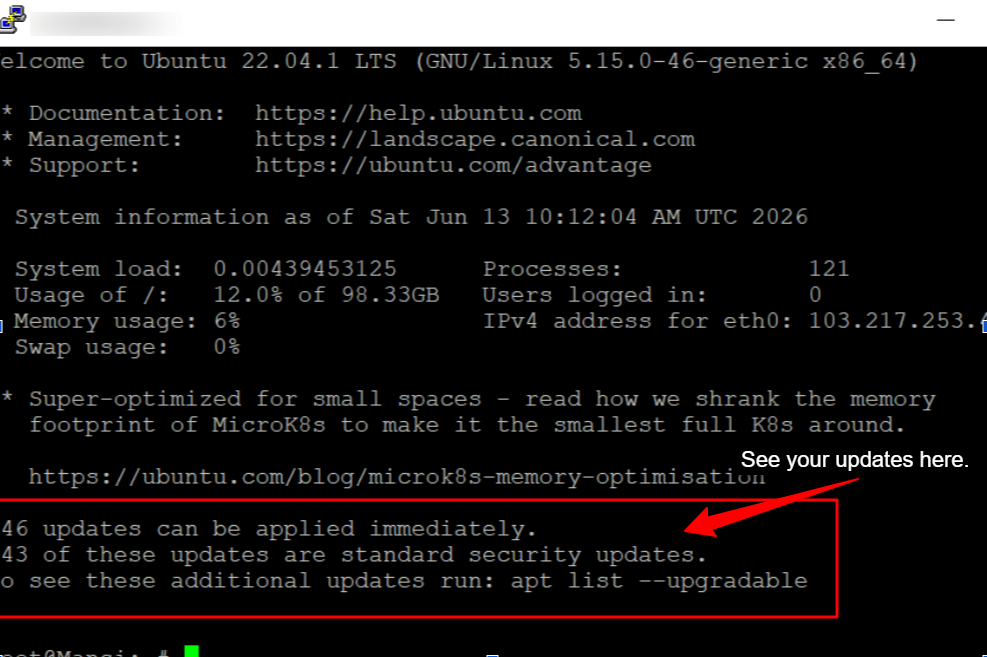
Note: If the update asks about restarting services, press Enter to accept the defaults. Once the update is done, restart your server with reboot and reconnect via SSH.
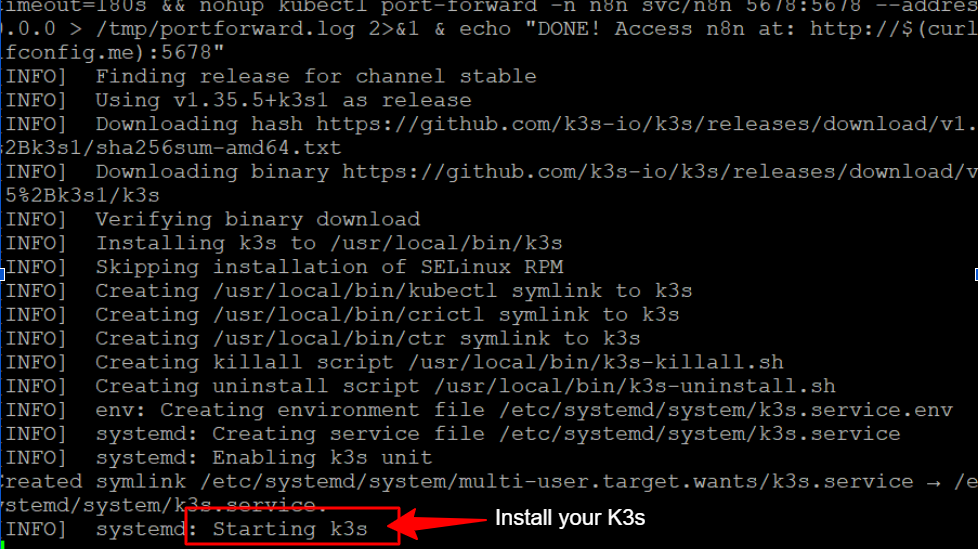
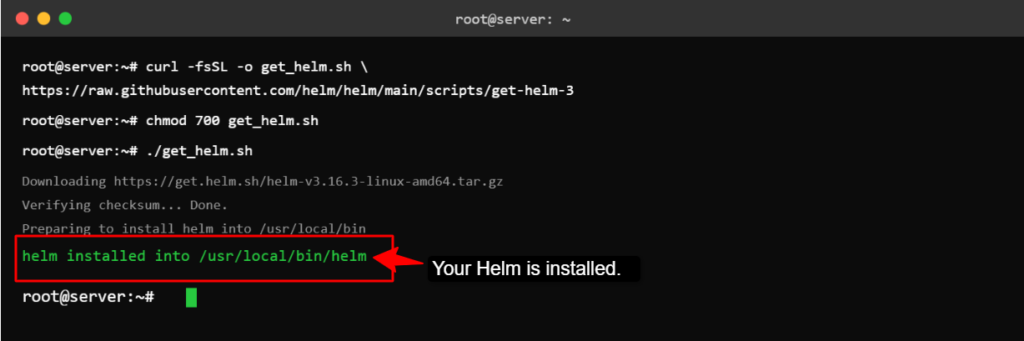
Note: Install these two tools you will need – Kubectl to talk to Kubernetes and Helm to deploy apps.
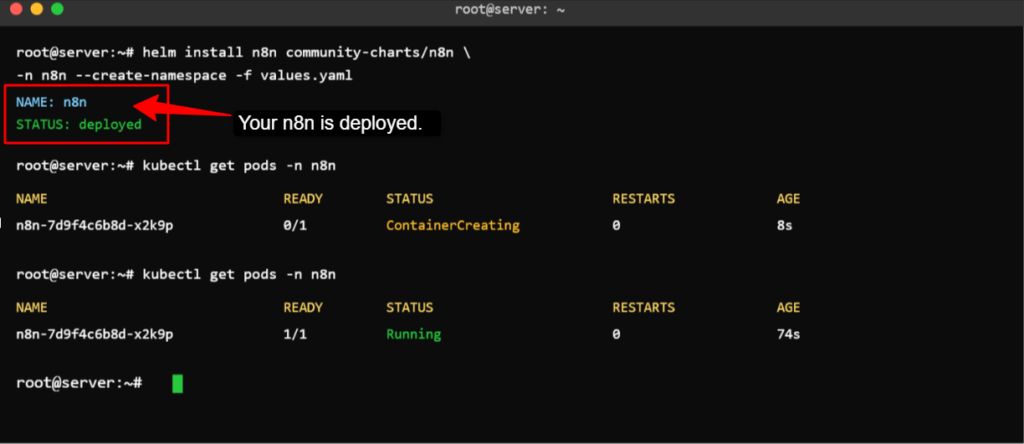
Add the Helm Chart Repository. Before you install n8n, Helm needs to know where to find the chart. Add the repository first: Option 1: Community Charts (Simple and good for starting). Option 2: 8gears Charts (recommended for production) |
Note: If it shows NotReady, wait for 30 seconds and run the command again.
| Three things to get right: Replace every yourdomain.com with your actual domain. Set a long random encryption key. Never change the encryption key after n8n is running. |
If your workflow is still there, it means your setup is working correctly, and your data is safe, but if it is not, then your persistent volume (storage) is not mounted properly, and you need to check your PVC status. Fix the storage configurations and don’t skip this step.
Common Errors and Fixes
Let us look at some of the common deployment errors and how you can fix them:
| Error | Cause | Fix |
| Pod keeps restarting. | Not enough memory | Increase memory limits in values .yaml. |
| Webhooks are not receiving triggers. | The wrong webhook URL is configured. | Make sure webhook_url matches your actual domain. |
| Can’t access n8n in the browser. | Ingress is not set up correctly. | Check the ingress class and DNS records pointing to your VPS. |
| Credentials stop working. | The encryption key was changed. | Never change encryption_key after the first setup. |
After all the setup work, the last thing you would want is to find a problem after you have gone live.
These errors are most common and easy to miss, but most of them come down to 3 things: wrong URLs, missing storage, or a change in the encryption key.
Spot them early, and your n8n setup will be running without any issues.
Checklist You Should Consider Before Going Live
After we have given you some common errors and their fixes, we come down to informing you about the checklist you should have before you consider going live:
Once you pass all these four major checks, you are ready to go live. Everything after this, like adding triggers, connecting apps, and adding workflows, will be built on this foundation.
Get it right once, and you will not have to touch it again.
Conclusion
Deploying n8n on Kubernetes with Helm takes a bit of setup upfront, but it is completely worth it, and following this n8n Kubernetes tutorial will give you an automation tool that stays up and recovers on its own.
You get an automation tool that stays up and recovers on its own. It will also grow with you as your workflows get more complex. The key things to get right are the storage, secrets, and URLs. Everything else follows from those.
Use Helm to keep your config file in one place, use Kubernetes to keep n8n running, and use a VPS to give it a stable home.
Once it is live and the checklist is done, you have a setup you can trust. Add your workflows, connect your tools, and let n8n do the work.
Updates are very simple, and scaling happens without downtime.
Further Readings
FAQs
Which Linux OS is best for running n8n?
Ubuntu 22.04 LTS is the best choice. It is stable and widely supported, giving long-term updates, and all the tools you need come with it pre-packaged. Dedian works too, but Ubuntu is simpler for beginners.
What is the minimum VPS size needed for n8n on Kubernetes?
The minimum is 2 CPU cores and 4 GB RAM. If you have a heavy workflow or production tasks, then go with 4 CPU cores and 8 GB RAM. Do not go lower than 2 cores because Kubernetes itself needs resources and will struggle on smaller setups.
Can I run multiple n8n instances on Kubernetes?
Yes, you can run multiple n8n instances in different namespaces, each with its own database and configurations. You can even run one instance with multiple worker pods for parallel execution.

![Fix Top 5 Issues Why n8n VPS hosting fails [Ultimate Guide]](https://qloudrdp.com/blog/wp-content/uploads/2026/06/n8n-not-working-on-vps-300x169.png)